In recent workshops, I’ve led artists in a series of exercises exploring acrylic mediums in traditional, as well as non-traditional, ways. In the simplest terms, mediums generally are added to paint, added to the surface or applied on top of paint. Mediums enhance or alter the properties of acrylic paint, and there are many exciting ways to use them!
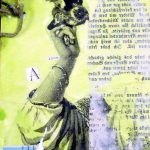
One of the techniques that I taught, and the one that I received the most questions about, was using Atelier Mediums to create image transfers. Image transfers are a process of getting ink absorbed into an acrylic film. Most printed or toner-based images can transfer. Newspaper, magazine and computer laser (not ink jet) prints work well. Some things like newspaper, laser print and old catalogs on uncoated paper will transfer directly without the need of a photocopy, but some images such as photographs and coated magazine pages will need to be photocopied. Because of all the variables involved (such as image type, surface and medium) transfers are not always clean. Instead, being open to the process gives one freedom to explore and manipulate the beauty of the transferred image. Be sure to use your own images, or ones that are in the public domain, to avoid any copyright issues.
Transfers work with a variety of mediums. The ones I like the best are Binder Medium, Matte Medium/Varnish, Impasto Gel and Modelling Compound. I encourage you to experiment with these mediums to discover what you like best, as each has its own features. The Binder Medium works quickly; the Matte Medium/Varnish creates an almost invisible transfer; the Impasto Gel is more translucent but textural; and the Modelling Compound is textural and dries white. How long you wait before removing the image, and the image itself, are all factors in the success of the transfer.
To apply an image directly to a surface, use Binder Medium, Matte Medium/Varnish, Impasto Gel or Modelling Compound
- Apply your chosen medium directly to your surface using a brush or palette knife. If you are using a heavier medium like Impasto Gel or Modelling Compound, you do not want the medium to be too thin or too thick, about 1/16-1/8” is good. The more medium you use, the more opaque the transfer will be. I find that brushing horizontally and then vertically helps to eliminate brushstrokes. I also use my fingers to smooth these heavy mediums out.
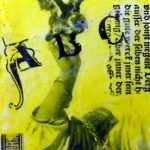
- Closely cut out the image you want to transfer. Remember to flip (make a mirror image) of any text you want to read correctly.
- Apply the image face down into the wet medium and smooth it out so you don’t have wrinkles. Try to leave an edge that is not in medium, so you have something to pull when it comes time to remove the paper.
- Let dry. Binder Medium and Matte Medium/Varnish dry in about 15-30 minutes, while Impasto Gel and Modelling Compound dry in 8-24 hours. (The Impasto Gel will be clear when dry). Using hairdryers to force dry does not produce good results. Only time does.
- If you have an edge, pull to remove as much of the paper backing as possible. Do not be discouraged if not a lot comes off! That is normal.
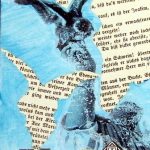
- Wet the paper backing. I often apply a wet (not dripping) washcloth and let it sit on the paper for a bit, or use a water sprayer to wet the paper. Next, very carefully begin to rub the paper away with your fingers in a circular motion. Apply more water as needed to remove the paper backing. As the water dries, you’ll see a white haze where some of the paper is left behind. Let the transfer dry, and repeat the process until you don’t feel any more paper.
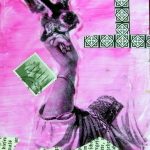
To create a separate transferred element to be collaged, use Impasto Gel:
- Apply Impasto Gel directly on top of the printed image using a brush as described above. Using this method, you won’t need to reverse any text.
- Let dry overnight (about 8-24 hours). The gel will be clear when dry.
- Wet the paper backing and remove as described above.